Replace Sensor/Equipment Battery
Change Batteries
Replace Sensor Batteries
Inside of each of your sensors is a battery with a life of 3-5 years on a full charge. There are some cases where your battery might die long before you think it should. When this happens, your panel will alert you, that you have a sensor reporting a low battery.
Be sure the panel is reading "low battery" and not another error message. Changing our batteries is easy! Each sensor takes its own battery type.
Door/Window Battery
If you have received a Door or Window sensor Low Battery message on your panel, you will need to replace the battery promptly to ensure the device continues to function properly.
Battery Type:

CR-2032-3V
How to Replace Battery
- Disarm your Touch panel before you begin this process.
- Open the door or window sensor (large piece) by finding the perimeter side with 3 raised lines.
- Insert a flathead screwdriver into the gap and pry open the cover.
- Remove the module inside the cover by turning the cover upside down over your hand.
- Use a screwdriver to slide the batteries out from under the black padded circles.
- Pay close attention to the orientation of the (+) and (-) sides of the battery in the button.
- Place two new CR2032 batteries into the module.
- Replace the module into the sensor and put the sensor back together.
To ensure that your Door or Window sensor is functioning properly, run a Complete Sensor Signal Test.
- Enter into your Settings.
- Click on System.
- Click Test System.
- Click the greyed-out Test button.
You will only have to test your Door or Window sensor, of course, have the option to run the complete test. Once your sensor verifies with the monitoring station, you can exit the test by pressing the Home button on the panel.
Motion Battery
If you have received a Motion Sensor Low Battery message on your panel, you will need to replace the battery promptly to ensure the device continues to function properly.
Battery Type:
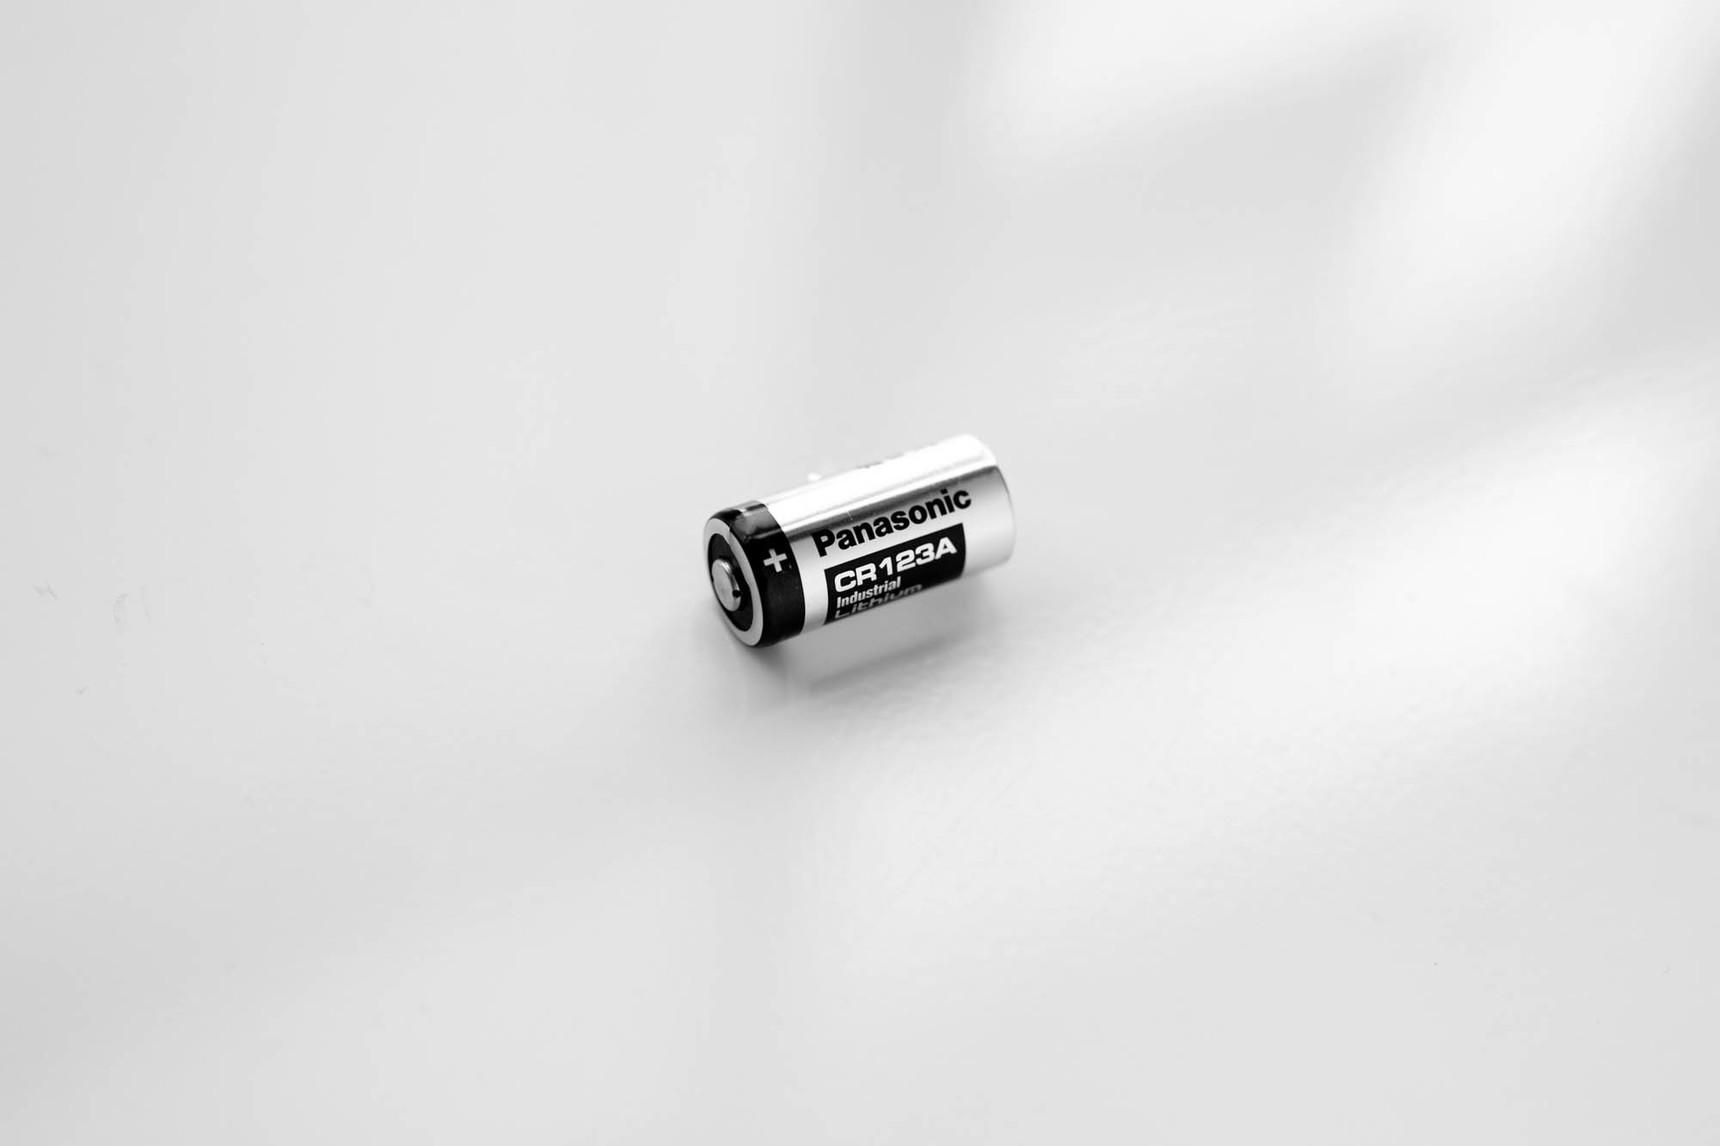
CR-123A
How to Replace Battery
- Disarm your Touch panel before you begin this process.
- Open the Motion sensor by pressing in on the recessed tab at the bottom of the sensor and pull the case towards you to remove the sensor from the base plate.
- Pay close attention to the orientation of the (+) and (-) sides of the battery.
- Place the new CR123A battery in the sensor.
- Replace the sensor case back on the base plate.
To ensure that your Motion sensor is functioning properly, run a Complete Sensor Signal Test.
- Enter into your Settings.
- Click on "System".
- Click "Test System".
- Click the greyed out "Test" button.
You will only have to test your Motion sensor, of course, have the option to run the complete test. Once your sensor verifies with the monitoring station, you can exit the test by pressing the Home button on the panel.
Glass Break Battery
If you have received a Glass Break Detector Low Battery message on your panel, you will need to replace the battery promptly to ensure the device continues to function properly.
Battery Type:
AA batteries
How to Replace Battery
- Disarm your Touch panel before you begin this process.
- Open the Glass Break Detector by turning the sensor counterclockwise. This will remove the sensor from the mounting plate.
- Pay close attention to the orientation of the (+) and (-) sides of the battery in the button.
- Place the new two AA batteries in the detector.
- To remount the sensor, align the raised marks on the outside edge of the sensor and mounting plate and rotate clockwise.
To ensure that your Glass Break Detector is functioning properly, run a Complete Sensor Signal Test.
- Enter into your Settings
- Click on System
- Click Test System
- Click the greyed out Test button
You will only have to test your Glass Break Detector, of course, have the option to run the complete test. Once your sensor verifies with the monitoring station, you can exit the test by pressing the Home button on the panel.
Smoke/Carbon Combo Battery
If you have received a Smoke/Carbon Combo Low Battery message on your panel, you will need to replace the battery promptly to ensure the device continues to function properly.
Battery Type:
CR-123A
How to Replace Battery
- Disarm your Touch panel before you begin this process.
- Open the Smoke/Carbon Combo Sensor by turning the detector counterclockwise until the back cover releases.
- Pay close attention to the orientation of the (+) and (-) sides of the battery in the button.
- Place two new CR-123A batteries in the detector.
- Wait 20 seconds while the Smoke/Carbon Combo Sensor resets.
- Turn the Smoke/Carbon Combo Sensor clockwise back into place on the mounting plate.
To ensure that your Smoke/Carbon Combo Sensor is functioning properly, run a Complete Sensor Signal Test.
- Enter into your Settings.
- Click on System.
- Click Test System.
- Click the greyed-out Test button.
You will only have to test your Smoke/Carbon Combo Sensor, of course, have the option to run the complete test. Once your sensor verifies with the monitoring station, you can exit the test by pressing the Home button on the panel.
Carbon Monoxide Battery
If you have received a Carbon Monoxide Detector Low Battery message on your panel, you will need to replace the battery promptly to ensure the device continues to function properly.
Battery Type
CR-123A
How to Replace Battery
- Disarm your Touch panel before you begin this process.
- Open the Carbon Monoxide Detector by turning the detector counterclockwise until the back cover releases.
- Pay close attention to the orientation of the (+) and (-) sides of the battery in the button.
- Place one new CR-123A battery in the detector.
- Wait 20 seconds while the Carbon Monoxide Detector resets.
- Turn the Carbon Monoxide Detector clockwise back into place on the mounting plate.
To ensure that your Carbon Monoxide Detector is functioning properly, run a Complete Sensor Signal Test.
- Enter into your Settings.
- Click on System.
- Click Test System.
- Click the greyed out Test button.
You will only have to test your Carbon Monoxide Detector, of course, have the option to run the complete test. Once your sensor verifies with the monitoring station, you can exit the test by pressing the Home button on the panel.
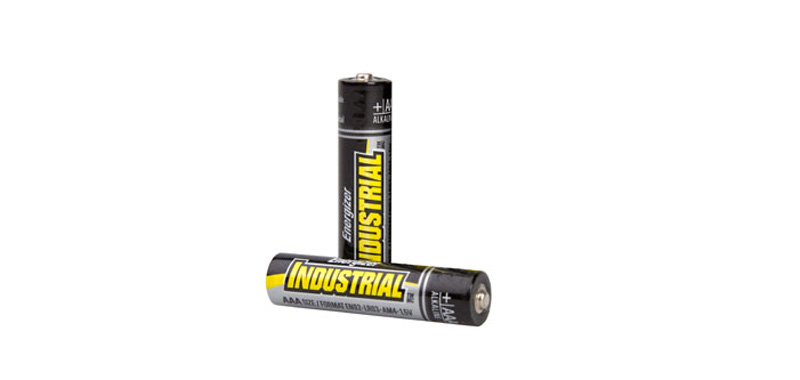
Smoke/Heat/Freeze Battery
If you have received a Smoke Heat Freeze Detector Low Battery message on your panel, you will need to replace the battery promptly to ensure the device continues to function properly.
Battery Type
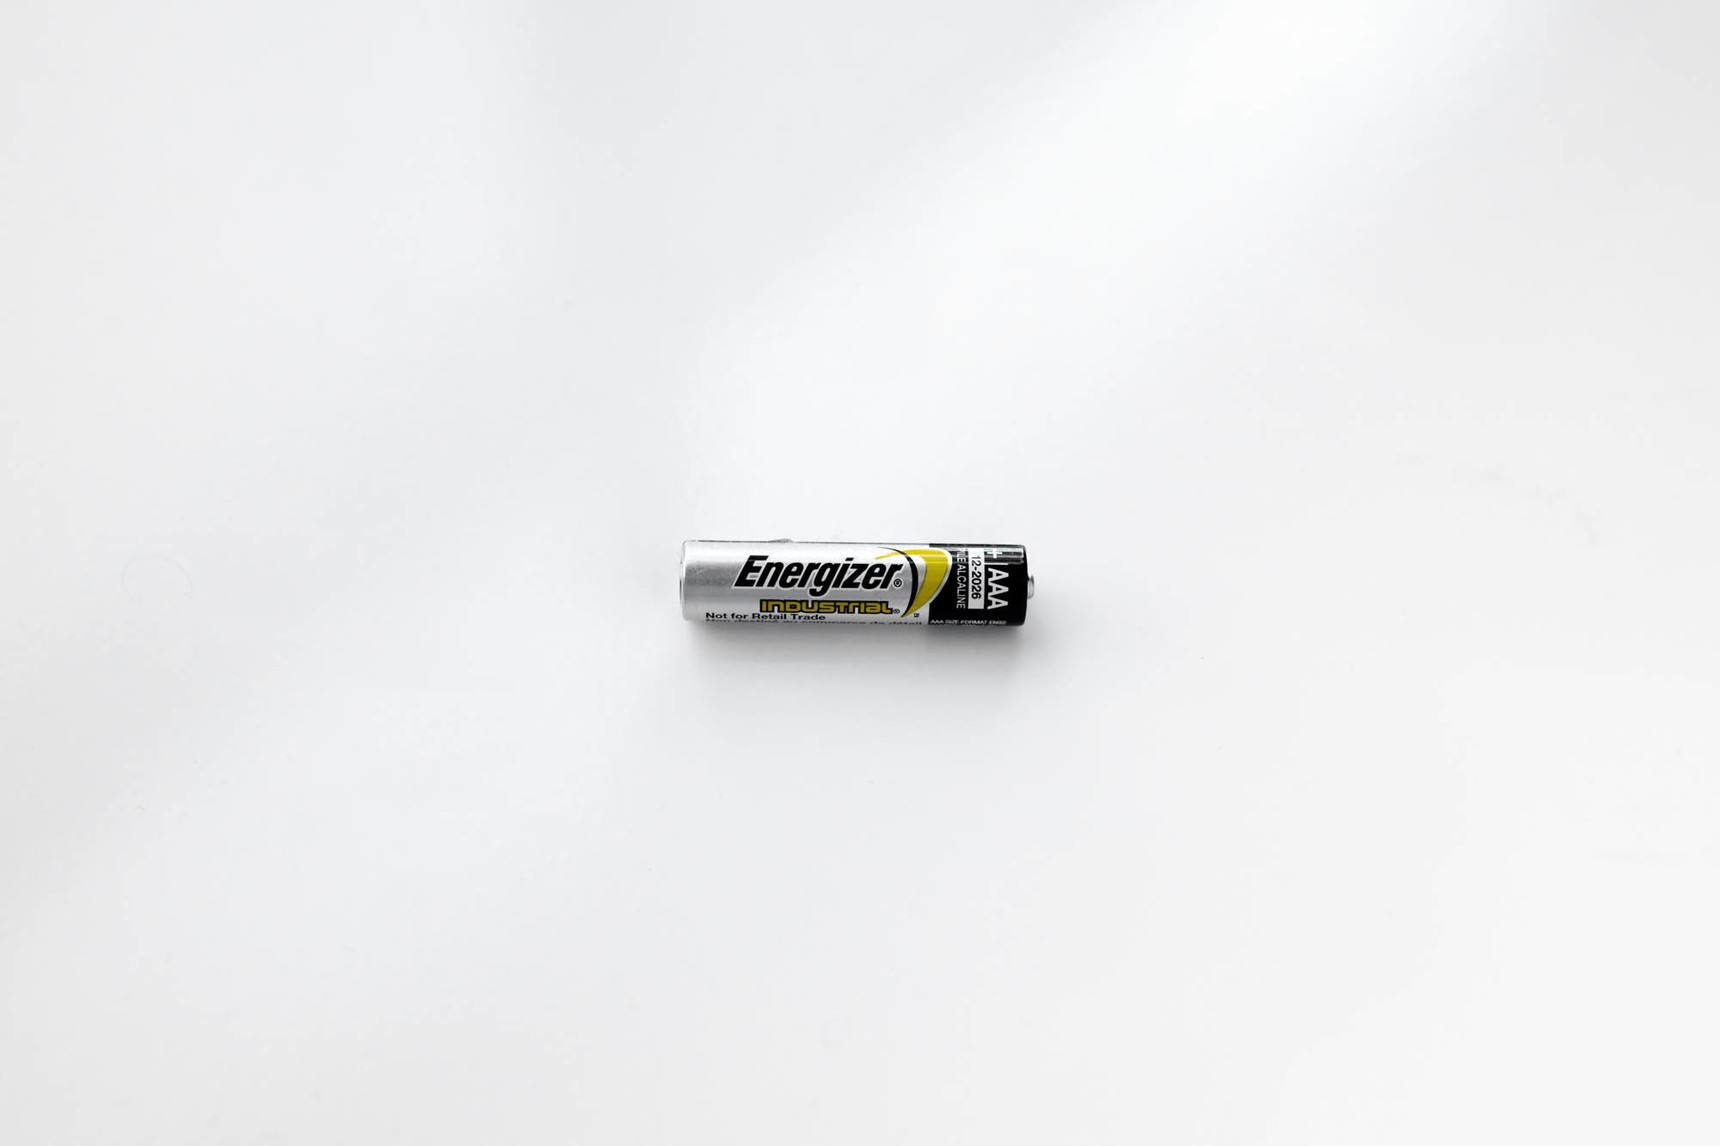
AAA
How to Replace Battery
- Disarm your Touch panel before you begin this process.
- Open the Smoke Heat Freeze Detector by turning the detector counterclockwise until the back cover releases.
- Pay close attention to the orientation of the (+) and (-) sides of the battery in the button.
- Place three new AAA batteries in the detector.
- Wait 20 seconds while the Smoke Heat Freeze Detector resets.
- Turn the Smoke Heat Freeze Detector clockwise back into place on the mounting plate.
To ensure that your Smoke Heat Freeze Detector is functioning properly, run a Complete Sensor Signal Test.
- Enter into your Settings.
- Click on System.
- Click Test System.
- Click the greyed out Test button.
You will only have to test your Smoke Heat Freeze Detector, of course, have the option to run the complete test. Once your sensor verifies with the monitoring station, you can exit the test by pressing the Home button on the panel.
Flood + Freeze Battery
If you have received a Flood Freeze Sensor Low Battery message on your panel, you will need to replace the battery promptly to ensure the device continues to function properly.
Battery Type
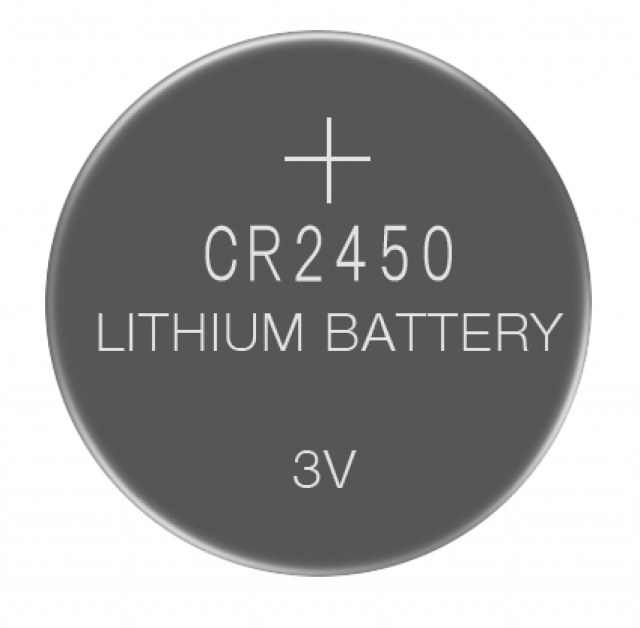
CR-2450
How to Replace Battery
- Disarm your Touch panel before you begin this process.
- Remove the rubber feet on the bottom of the sensor.
- Remove the screws and the casing.
- Pay close attention to the orientation of the (+) and (-) sides of the battery in the button.
- Place the new CR-2450 battery in the sensor.
- Reassemble the casing, screws, and rubber feet on the bottom of the sensor.
To ensure that your Flood Freeze sensor is functioning properly, run a Complete Sensor Signal Test.
- Enter into your Settings.
- Click on System.
- Click Test System.
- Click the greyed out Test button.
You will only have to test your Flood Freeze sensor, of course, have the option to run the complete test. Once your sensor verifies with the monitoring station, you can exit the test by pressing the Home button on the panel.
Key Remote Battery
If you have received a Key Remote Low Battery message on your panel, you will need to replace the battery promptly to ensure the device continues to function properly.
Battery Type
CR-2032-3V
How to Replace Battery
- Disarm your Touch panel before you begin this process.
- Remove the screw on the back of the remote.
- Open the cover.
- Pay close attention to the orientation of the (+) of the battery in the remote.
- Remove the old battery by sliding it out of the battery clip.
- Slide new battery into place.
- Put your remote back together.
To ensure that your Key Remote is functioning properly, run a Complete Sensor Signal Test.
- Enter into your Settings.
- Click on System.
- Click Test System.
- Click the greyed out Test button.
You will only have to test your key remote, of course, have the option to run the complete test. Once your remote verifies with the monitoring station, you can exit the test by pressing the Home button on the panel.
Medical Button Battery
If you have received a Medical Button Low Battery message on your panel, you will need to replace the battery promptly to ensure the device continues to function properly.
Battery Type
CR-2032-3V
How to Replace Your Battery
- Disarm your Touch panel before you start this process.
- Remove the four screws at the back of the pendant.
- Pay close attention to the orientation of the (+) and (-) sides of the battery in the button.
- Remove the older battery from the Medical button.
- Place the new battery in the Medical button.
- Replace the casing and screws on the button.
To ensure that your Medical button is functioning properly, run a Complete Sensor Signal Test.
- Enter into your Settings.
- Click on System.
- Click Test System.
- Click the greyed out Test button.
You will only have to test your medical button, of course, have the option to run the complete test. Once your button verifies with the monitoring station, you can exit the test by pressing the Home button on the panel.
Alarm Panel Backup Battery
The panel backup battery provides power, up to 24 hours, in the event of a power outage. The battery automatically recharges once power is restored to the panel. If you receive a panel low battery message, you should wait 24 hours to see if it will recharge. If the panel low battery message continues, promptly replace the panel battery to ensure proper system functionality. You will need to call Support.
Replacing Backup Battery
- Disarm your Touch Panel.
- Unplug your panel from the outlet.
-
Remove the back of the panel
- Remove the panel from the mount.
- Remove the screw below the tamper button on the back of the panel.
- Push down on the backplate to unlock from its position.
- Gently remove the battery and disconnect the wire from the panel.
- Gently plug in the new battery.
- Put your panel back together and place it back on its mount.
- Plug your panel into the outlet.
Your system will power on and may perform a 6 step communication test and afterward will be ready for use.